Monday, December 2, 2013

Kestrel Talon Review - Criterium Podium Machine

I want to start off by saying that I am not sponsored by Kestrel, but wanted to write this review to share my awesome experience with it.  My Kestrel Talon took me to my first podium finish and win as well as many others afterwards.
KESTREL EMS PRO SEATPOST + RITCHEY CLAMP SYSTEM = "A BIKE FITTERS DREAM"
What made the Talon most impressive was its ability to adjust saddle tilt and the seatpost angle with extreme accuracy via the saddle mount.  By being able to dial in the bike fit, I could handle any ride or race efficiently.  If I knew a race was going to be fast like the Indy Crit (~27 mph average), I could shift the seatpost angle two degrees forward to make the aero position more comfortable.  In contrast, I could easily move the seatpost angle backwards and reduce saddle tilt to make hilly courses more comfortable.

The icing on the cake was the ease of saddle adjustments.  In less than a minute, I could adjust my saddle tilt to the exact degree I wanted via a single bolt.  This technology needs to become a standard in all seatpost!  I never had an overuse injury on this bike because my bike fit was perfect!  Did I mention that I unintentionally finished my first century in less than 5 hours and 18 minutes on my Kestrel Talon?  Most of the time was spent in an aero position on the drops.  Check out my century ride on Strava:


2013 CRITERIUM RACE RESULTS
The Kestrel Talon was more than capable to produce podium finishes at various course profiles.  Out of six races, it carried me to four podium finishes.  It was stiff enough to win an uphill sprint finish
(Eagle Creek), agile enough to manage the tightest corners (Mass Ave Criterium State Championship) and aerodynamic enough to bridge a gap in the fastest criteriums (Indy Crit 27mph average speed).  Many of these races had fields of over 80 riders which awarded me the option to upgrade to Pro 3.  All of my races were uploaded to Strava, so feel free to check them out AND don't forget to follow me!

Eagle Creek Traditional Criterium (First Place): 
Indy Crit (2nd Place): 
Bloomington Criterium (3rd place): 
Mass Ave Criterium State Championship (2nd Place):  

SHORT WHEELBASE = CRISP, FAST HANDLING
Coming from a sports car racing background, I knew the Kestrel Talon would be awesome in criteriums.  With a wheelbase shorter than most road bikes, I could appreciate the ride characteristics that comes with a short wheelbase.  Whenever I would find myself needing to change my line after breaking away off the front, I could do it without hesitation.  The sensation was similar to a skier cutting into the snow to change direction quickly.  This was especially useful for avoiding crashes!

GOODBYE KESTREL TALON
Unfortunately, I was forced to stop riding my Kestrel Talon after I was sent crashing to the ground at 33mph when my new, but defective Continental GP4000S tire ripped apart after I made a solo attack and reached 33mph.  I fell on my back, shoulder and head which gave me a concussion.  The strains and sprains at my neck, shoulder and abdomen were just as bad as the road rash that riddled my body.  If you get grossed out easily, don't look at the pictures below.  I had road rash on both shoulders, one side of my abdomen, both arms and both legs.  Please stop riding Continental GP4000S tires until they announce that they resolved these defects in their tires.  My tires had no sidewall bubbling when they completely failed.  Check it out:
All I have now are pictures and videos of my Kestrel Talon.  It was a great bike and I would highly recommend it to anyone looking for a comfortable, high performance bike for racing and training on the road.  If I could afford another one, I would definitely go back to it!


VIDEOS
The video below was a lap comparison around the Marian University Criterium route.  I was experimenting with different pacing strategies around the ~2 mile loop to determine where I would want to attack, conserve, etc..
The only weak spot in the build were the Oval Concepts 524 wheels.  They were very flexible in the sprints.  The video below demonstrates the excessive amount of lateral flex the wheels had.  The wheelset seemed to be more appropriate for tempo efforts and not accelerations or sprints.

To ensure that the wheel was flexing and not the frame, I compared the Oval Concepts 524 wheel to an Alex Rims 32 spoke wheel and retested it for flex.  Result?  The 32 spoke wheel showed almost no flex or deflection.  After seeing the video, I worked with my sponsors at Velocity Wheels and The Wheel Department to hand build a light racing wheelset with the same stiff build characteristics as the Alex Rims wheel. 
UPDATE: 2013 USA CYCLING REPORT ON KESTREL
I was surprised to hear that in a 2013 USA Cycling report, only ~2% of registered riders own a Kestrel.  Although Kestrel is known for their high end triathlon bikes, cyclists should really consider it for criterium or road racing.  I was glad to represent the small minority through some strong results in 2013!
 

Friday, September 27, 2013

How To Hold an Aero Position

Peter Sagan holding an aero position with minimal
compensation - Photo by Ezra Shaw Getty Images
There are climbs and then there are winds.  For many cyclists, riding into a strong wind can be more difficult than climbing, mostly because cyclists are required to reach a low aerodynamic position which can be uncomfortable, difficult or painful to hold.  Cyclists must demonstrate adequate hamstring and lower back flexibility to hold an aero position comfortably.  The flexibility needed to ride well in the wind can take time to develop, but with enough dedication and experience, anyone can become proficient at holding an aero position safely.  Here are some steps you can take to make holding an aero posture as comfortable as being on the hoods:

#1 LEARN YOUR LIMITS.
The worst thing a rider could do is force a low aero position and hope for the best.  With low back pain being one of the most frequent complaints among pros and recreational cyclist alike, the chances of long term pain- or injury-free riding are slim.  Develop the flexibility first, then shoot for the next lowest position you can hold with a neutral spine.


Notice how there's no compensation at the lower
or thoracic spine.  Photo by ratemyarms.com
Check your hamstring and lower back flexibility by standing with both feet shoulder width apart.  Bend at the knees around 20-30 degrees to mimic the bottom of the pedal stroke.  While maintaining this knee position, push the hips back and hinge only at the hips to lower the torso slowly towards the ground.  As you get lower, try your best to maintain a neutral spine while observing your back in a mirror.  Eventually, the lower (lumbar) or middle (thoracic) section of the back will start to bend to compensate for the lack of flexibility from the hamstrings.  Once you start to see the back bend, back it up a little bit until you get back into neutral- this is the lowest, comfortable position on the bike.  Record the hip angle from this test using a goniometer or take a picture for reference.


#2 UPDATE & REFINE YOUR BIKE FIT
The bike must be fit to the limitations of the body, not beyond it.  This may mean temporarily sacrificing some aerodynamics to protect the spine.  As flexibility improves, try lowering your aero position by making some simple bike adjustments.
  • Raise the saddle height:  Raising the hips relative to the handlebar will allow the torso to reach a more parallel-to-the-ground position.  Be careful though... the optimal saddle height for injury prevention allows for 25 to 30 degrees knee flexion (1).  Going above or below this range can lead to an overuse injury.
  • Tilt the saddle nose down:  Tilting the nose down will allow the pelvis to tilt forward and make it easier to maintain a neutral spine easier.  The optimal saddle tilt for low back pain prevention is around 10-15 degrees downward tilt.  Cyclists who compensate heavily at the thoracic and lumbar spine may benefit from a downward tilt.
  • Lower the handlebar:
    • Flip the stem:  If the stem forms an angle pointing away from the ground, removing the stem and installing it upside down will lower the handlebars.  The amount of drop depends on the angle of the stem.
    • Remove a spacer:  If you have a threadless fork/ headset, removing spacers is another option which can lower the handlebar height by 0.5" or 1" increments.
Bradley Wiggins compensating at the thoracic spine.
A downward tilt may help him tilt his pelvis downwards
to reach neutral while improving comfort.  - Photo by 
BAS CZERWINSKI/AP/Press Association Images
#3 WORK ON YOUR WEAKNESS.
While it can take weeks, months or over a year for an injury or reoccurring pain to develop as a result of faulty posture, it's not a risk that anyone should take, especially since it's preventable!  As long as the faulty posture wasn't caused by scoliosis or from the aftermath of a surgery, there are exercises which can improve the mobility of the spine and streamline your aero posture.  All you need is a floor and a foam roller.
Cobra Pose -
Photo by cope-stress.blogspot.com
  1. Riders compensating at the lower back:  Riders who fall into this category must work on improving lower back range of motion.  A simple yoga pose called the Cobra Pose can help improve flexibility specifically at the lower back.  Hold the pose for 30 seconds.  About 10-15 seconds into the stretch, try to relax and reach a deeper stretch for the remainder of the time.
  2. Riders compensating at the thoracic spine:  Riders who fall into this category lack spinal extension at the thoracic spine.  By performing a thoracic spine extension mobility exercise, eventually you can reach neutral and streamline your aero position.  With your back against a foam roller, do 15-20 repetitions of very slow and controlled extensions.  Target the entire thoracic spine by starting at the upper back near the lower border of the scapular, then shift the foam roller in small increments towards the lower back.  Do the same number of repetitions per downward shift of the foam roller.
Thoracic Spine Extension Mobility Exercise - Photo by Fitstream.com
Both types of riders must also work on hamstring flexibility exercises often as it is the major limiting factor to a safe, aerodynamic posture.  See my post on stretching for more information.

#4 REPEAT STEPS ONE THROUGH THREE.
Every week to two weeks, check your progress by retesting your flexibility levels.  As your body becomes more flexibile, reward yourself by adjusting your bike to allow for a lower position.  Keep working on your weaknesses until you can reach your lowest, most efficient aero posture.  Once you've met your goal, continue to do the mobility and flexibility exercises above to maintain your progress.

REFERENCES:
Asplund, Chad, MD, and Patrick, MD Pierre. "Knee Pain and Bicycling." The Physician and Sportsmedicine 32.4 (2004): 7. Print.

Saturday, August 10, 2013

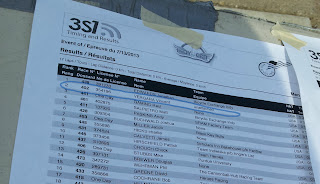
Indiana State Criterium Championships - Second Place!

This marks my fourth podium of the season!  From a strategic standpoint, this race was the hardest race I've done.  There was a very quick, but hard attack at two laps to go which was the main deciding factor for the podium.  Anyone who failed to see the attack and respond quickly enough was pushed too far back and lost any chance at the podium.  I fortunately called the attack immediately and reached a good position for the final lap.  Unfortunately, everyone in front of me peeled off earlier than I expected and forced me to the front.  On the final sprint, I was passed shortly before the finish line because I wasn't fresh enough to outsprint everyone.  I'm extremely happy with the result considering that I could have easily lost the podium if I missed the attack which separated the lead group from the rest of the peloton.  SECOND PLACE!!! :)

I recorded the ride via Strava.  Check out my ride through the link below and don't forget to follow me!


I'll post more pictures as they come and post screenshot images from my Polar ProTrainer 5 software too.  For now, I'm going back to the event to see if I won the raffle for a pair of Zipp wheels!

Friday, August 9, 2013

Live Televised Race Coverage Tomorrow!

Mass Ave Criterium State Championships
Follow this link to watch the Mass Ave Criterium State Championships live via mobile or computer: http://mac.nuvo.net/

I race at 2:30 pm Category 4/5.  I'm only six points away from being eligible to upgrade to Pro 3!  I need two more podium finishes to get these points.  I only have three more races left before the season ends, so the pressure is definitely on!

I started my taper on Wednesday and focused on following recovery methodologies:
  • Light aerobic exercise followed by immediate carbohydrate replenishment via Chocolate Soy Milk (Silk brand)
  • Foam rolling
  • Tiger tail myofascial release
  • Static stretching
  • Antioxidant-rich foods
  • Hydration - Nothing specific... just the pee test!
Today, I feel 100% fresh, so I should be ready for anything tomorrow!

Saturday, July 27, 2013

Podium #3: Bloomington Cycling Grand Prix - Third Place!

Podium Picture from Truesport.com
This was my third podium out of the four criteriums I raced this season!  I was especially happy to be third because I barely made it to the podium this time.  About half way through the race, I made a strong, all-out attack that stretched out the field and minimized attacks for the remainder of the race.  I tried to ride more aggressively to show that I can use other tactics other than just sitting in until the final lap.  The goal of the attack was to drop riders, scatter the teams and weaken the sprinters.  I did this because I noticed that the teams were "hogging" the front of the peloton to dictate the pace in favor of their sprinter.  My plan backfired when I realized that I went too hard and barely had enough energy for the final sprint.  I passed third place right before the finish line.  This was one of the hardest days on the bike thus far.  I was super happy to have third place, especially when it seemed like I wouldn't have been there at all!

THE COURSE:
Below is a map of the course.  The course ran counterclockwise and started/ finished about 3/4 of the way on Kirkwood Avenue.
I attached a Strava screenshot of the elevation profile from the course below.  The start/ finish was on a ~3.2% hill.  After making a left turn onto Indiana, half of the distance is a short downhill followed by a short 5% hill towards the next turn onto 7th street.  Using a tight line was important to safely execute the turn from 7th Street to Dunn.  Dunn was a little bit tricky.  Half of the road was on camber and the other half was off camber.  Last year, there were a lot of accidents caused by riders exiting too wide and being unable to adjust their line due to the off camber of the road.  Immediately turning onto 6th street was a hard headwind and a few potholes/ raised pavement that could easily cause a flat.  7th street to grant was very short, so there was very little opportunity to pass.  Kirkwood starts off very flat until passing Dunn.  The grade progressively reaches a peak elevation of about 5% after Dunn.
THE ATTACK:
I attacked right after the turn onto 7th street.  I attacked here for three reasons:

  1. This was where the peloton's overall speed would start to drop.
  2. The peloton would form less pacelines due to the tightness of the turns.
  3. I could pick the fastest line and use the whole road without worrying about hitting another rider.

From the previous laps, I kept a mental note about the average speed from 7th to Grant.  From the start of 7th street to the end of Grant, the peloton averaged about 23mph.  When I attacked, I averaged 28.4 mph from 7th street to the end of Grant.  Upon reaching Kirkwood, I turned around to see if anyone had matched my attack, but I was unfortunately solo and when a few riders closed the gap, no one wanted to keep the pressure on so we reintegrated back into the peloton.

Below is a Strava comparison of my average speed.  I placed markers at the start of my attack.  If you'd like to see the full graph from the race go to my Strava profile.
THE FINAL LAPS:
The final laps were pretty uneventful.  After I made a hard attack early in the race, the remainder of the race was pretty much steady state.  I unfortunately used up too much energy and stayed in the redline to sustain the elevated pace.  By the last lap, I was fifth wheel and my legs were still not ready for a final sprint, but that didn't matter since it was the final lap!  When we finally reached Kirkwood, the sprint started immediately and my legs still felt fried.  I ignored it and sprinted as hard as I could even though my legs felt numb and weak.  I passed fourth place on the flat before reaching Dunn, but had a moderate gap to third place.  Since I knew the elevation started to rise after Dunn, I made another kick which allowed me to pass third place!  The major thought that motivated me to keep sprinting was the panic that set in after realizing that I might not reach the podium!  It felt good to be third place!

Again, I'd like to thank my sponsors WeightVest.com, VelocityUSA.com and DeSotoSport.com!

Saturday, July 13, 2013

Indy Criterium 2013 - 2nd Place!

Indy Crit 2013 - 2nd Place!
It was an incredible feeling being on the podium at the biggest cycling event in Indianapolis, the Indy Crit!  With 89 riders and a flat course not suited for a lightweight rider like me, this race was far from easy which you'll understand after seeing the race data further down this post.  Anyway, the suffering was well worth it because today marked my first medal!
Indy Crit 2013 - 2nd Place Medal
The picture below is the only podium picture I have right now.  The camera was having issues and luckily, it worked right before we walked completely off the podium!  Yes... it looks like I was wearing full winter gear, but those "winter tights" are actually skincoolers from De Soto Sport.  They provide UV protection and stay wet to keep me cool.
PAST EXPERIENCE AT THE INDY CRIT (2012):
For the weeks leading into the race, it would be an understatement to say that I was nervous!  At random times during the day, my heart rate would spike just from thinking about my past experience at this race.  I almost got dropped because I barely had the fitness to move up the group and close the gaps as the race progressed.  I left the race beat up, exhausted and glad to say that I didn't "DNF" this time!  Last year, my goal was to not get dropped, so I was actually really happy as long as I made it on the results list without the letters "DNF" next to it. lol

Indy Crit - Course map
89 RIDERS + FLAT COURSE = WORST CONDITIONS:
Although the cap was set to 75 riders, 89 riders showed at today's race.  I couldn't tell what made me more nervous, being intimidated by all of the teams or the huge field of riders!  While I was warming up with a good friend, Terry McDonald from Team Organic, I was so shakey that I mis-clipped and smashed my shin into my pedal.  I didn't know I had bled a good amount until I went home.  Adrenaline is a funny thing!

Without any significant elevation changes, the flat course and the potential for high speeds was better suited for the larger, more powerful riders.  I could only use the corners to my advantage.  Thanks to my low weight, I can accelerate without expending as much energy as my heavier rivals.

The course map is a little deceiving.  Some of the corners were four to five lanes wide, so everyone could enter and exit the corners without losing a significant amount of speed.

THE MAJORITY OF THE RACE:
I tried to stay as patient as possible to conserve my energy during the 45 minute race.  Without too much trouble, I was able to maintain contact with the front half of the peloton for most of the race.  As the race progressed and the pressure turned on, riders popped off the back one by one.  It was critical that I always kept an eye on the front of the peloton to make sure gaps weren't forming.  As soon as the rider I was drafting showed weakness, I would accelerate back to the lead group.  This basically continued throughout the race, with the occasional close call accident caused by riders losing their line.

FREAK CLOSE CALL ACCIDENT:
There was only one close call accident worth mentioning and it happened as I switched my hands from the hoods to the drops.  Before I entered turn three, I unexpectedly hit a pothole before my left hand could securely grab the drops.  In an instant, my left hand slipped off the drops and I rapidly fell towards my handlebar.  I don't know how I recovered from this potential wipeout because it happened so quickly, but I was miraculously able to regain control of my bike and complete the turn.  Maybe my chest slammed on my handlebar or I somehow caught myself with one arm... I don't know what happened, but I was really lucky on that corner.  Of course, something that has never happened in my years of cycling had to happen today!

THE LAST FIVE LAPS:
At five laps to go, I had worked my way into a good position.  Through some clever line selection, I was able to reach the top 10 positions, but since no one wanted to do work and keep the pressure on at the front, a train of riders was able to attack and pushed me back to ~40th position!  I was so far back that I thought my chances at even a top 10 finish was over, especially since the pace lifted significantly.  Panic set in, but I took a deep mental breath and made a goal to pass at least two people per turn.

By the last lap, I was able to bring myself back to the top ten positions.  My plan worked!  Approaching the second to last turn, I was fifth wheel back and saw a fast attack from the inside which I immediately called.  We held first and second position towards the final turn.  Since I noticed that the rider in front of me was throwing his bike and losing form, I planned to outsprint him on the straight to the finish.  After exiting the final turn, I was moving significantly faster than first place, but unfortunately miscalculated the distance of the turn to the finish.  Although I was moving significantly faster than first place, I didn't have enough road to pass him and finished at second place.  I was happy with the result, especially since I barely made it back to the front within the last five laps.

RACE DATA & ANALYSIS:
The red, black and blue line is my heart rate, cadence and speed, respectively.  As you can see in the graph below, I barely had any time to recover during the race.  Unlike the Eagle Creek Traditional Criterium that I won earlier in the season, I was near the top end of my lactic threshold almost the entire duration!
The chart below breaks down all of my efforts.  For one minute, I was able to stay within my VO2max.  This occurred when there was a sudden drop in the pace.  For 34 minutes 36 seconds, I was close to my lactic threshold.  I mostly used this energy system to sustain the speeds throughout the race.  Anytime I was either doing work at the front or bridging large gaps, I was in the red zone.  This shows just how hard it was for me to maintain the speed of the peloton without a draft.
I wanted to make sure that I didn't overcook my legs during the 4/5 race to ensure that I would be fresh for the 3/4 race a few hours later.  The goal was to hit my red zone for about 1% of the total duration.  The one percent was determined based on my workouts and notes in my training log.  Based on the chart, I met my goal and it payed off big time at the 3/4 race.  When I raced in the 3/4 category, I didn't have a good result because I had to avoid a pileup and close a big gap at ~2 mph faster than the 4/5 average speed.  I would have gotten dropped if I went too hard in the 4/5 race.
The data below correlates to the first graph.  This is pretty much self explanatory, but if you have any questions, feel free to leave a comment below!

SPONSORS:
I would like to give a huge thanks to my sponsors WeightVest.com, DeSotoSport.com, VelocityUSA.com and PolarUSA.com.  Even though I haven't joined an official team yet, I like to think of my sponsors as my teammates.  Without their help, I wouldn't have had the power, comfort and the peace of mind today to pull off a podium finish!

WeightVest.com:  They've been with me since my first race aka. "The DNF Season."  Their 150 pound weighted vest played a huge part in how quickly I progressed season to season.  I've never needed additional weight to keep my strength and plyometric training challenging.  This doesn't sound like much of an advantage, but there's a lot of value in having the convenience to train at home.  Less time traveling to a gym means more time to do more productive things!  Training with their V-Force vest definitely helped me stick with the bigger riders today.

De Soto Sport: Although I didn't appear to look comfortable based on the many jokes courtesy of the MC (white hat), my Skincooler Leg Coolers helped big time today!  I'm glad I made it to the podium because afterwards, the MC made amends by promising to cut down on the jokes after he realized I was on the podium. :)

Velocity Wheels:  I was super impressed with the Velocity A23 Pro Build wheelset!  There were so many times where I was certain that I had a flat tire after riding over the deep potholes and man-hole covers riddled throughout the course.  The bone-rattling brick section was also a thing of the past.  I unexpectedly was able to remain seated comfortably throughout the entire brick section of the course.

It was also super easy to corner without having the fear that I might lose grip.  This played a huge part in getting into a good position on the final lap.  During some post race maintenance, it was even more impressive to watch both wheels spin true!  Thanks a ton for hand building me a set!

Friday, May 10, 2013

Giro Air Attack Shield Review

I was excited when I heard about the Giro Air Attack.  Not because it's more "aero" than a standard helmet, but because I could stop wearing those huge over-the-prescription Solar Shield sunglasses (left).

Since the first thing I did when I got the helmet was practice removing and mounting the lens, I'll start this review off with a little how-to.


HOW TO TAKE THE LENS OFF (WITHOUT SMUDGING THE LENS!)
In order to remove the lens without smudging, place a thumb on the nosepiece and hold the top edge with a finger, then push upwards (vertically) with the thumb to free the center magnet, then pull the lens to free the rest of the magnets.  Don't shift the lens down or else it will hit your cheek.
Push up with the thumb to release the lens.
HOW TO PUT THE LENS ON
This part can be sort of difficult at first, but if you use this method to get the lens on, it will be a piece of cake!  By using the three ventilation holes as a marker, center the holes right below the border of the helmet.  You really don't have to "look" for the magnets because once the ventilation holes are centered at the right position, the magnets should pop right in.
Align the ventilation slits in the center of the helmet
to snap the lens onto the mounting magnets
A FEW WORDS ABOUT STYLE
I don't know if people are just trying to be nice, but I have been getting a lot of positive comments about the helmet.  This was surprising to me, especially after reading all of the negative comments scattered around the web.

I tend to pick up on non-verbal cues better.  The best way I can describe people's reaction to this helmet is that they have a "neutral awe."  Sometimes the look lasts a few seconds and sometimes it lasts long enough to be awkward.  It's hard to tell whether this is a negative or positive thing, but as long as I don't get the "ugly" look (which was the case in my Solar Shields), then I'm happy!

VENTILATION: VISOR ON VS. VISOR OFF
Compared to my previous helmet which had 20 vents, my head felt surprisingly cooler in the Air Attack!  It didn't matter whether the visor was on or off.  By taking the visor off, the only perceptible difference I noticed was that more air would hit my face.

The Air Attack seems to keep my head cooler not through ventilation, but through greater UV protection.  In my previous helmet, the top of my head would always feel dry and hot to the touch after a ride.  My experience with the Air Attack has been the total opposite- wet and cool.  I'll be able to put the helmet to the ultimate test once it gets up to 100+ degrees.

The hottest ride I've done so far was an 81 degree group ride lasting one hour and 26 minutes- this included a 10+ mile breakaway.  Check out the ride below.  For the entire duration of the ride, I left the visor on and never felt like my head was getting too hot.  In fact, I only felt the need to drink a little less than 3/4 of my 25oz. insulated Camelbak water bottle!  I did have an extra advantage though.  I wore a Skin Cooler Helmet Beanie and a Leg Cooler from my sponsor, De Soto Sport.  The combination of the De Soto Helmet Beanie and the Air Attack is a system that keeps my head very, very cool.


COOL FEATURE DESIGNED BY ACCIDENT?
During the group ride above, I noticed something that would later prove to be extremely useful.  By changing the tilt of my head from slightly up to parallel to the ground, I could significantly reduce the air flow going into my eyes by "sealing" the ventilation holes at the top of the lens.  It didn't seem to affect the ventilation going into the top of my head, but it definitely created a dead space around my face.  This feature was especially helpful when a car passed ahead and kicked up sand.  All I needed to do was tilt my head down to protect my eyes from the sand.

IN THE RAIN... 
Today, I rode in the rain and actually enjoyed it!  I could see much better with the integrated lens than my sunglasses because I had a greater field of vision to work with.  Riding in the rain also gave me a new idea to make this helmet even better... Rain-X or Car Wax!

WEIGHT
While I haven't weighed this helmet on my kitchen scale yet, it's noticeably heavier than my previous helmet (Giro Indicator).  Although it's a little heavier than my previous helmet, it would be embarrassing to consider the weight as a disadvantage.  Just to put a number out there, the claimed weight of the two helmets are 290g (Air Attack Shield) vs 290g (Indicator w/ Visor).  Small actual difference.

COST
Before I purchased this helmet, it was hard for me to justify spending so much, but after adding up the cost of all the sunglasses I've lost, it didn't hurt as much on the wallet.  Since the lens is almost always connected, I HOPE I won't lose it!

IMPROVES BODY AWARENESS
While the aerodynamic savings are difficult to measure, the shield has improved my body awareness by muting the feeling of the wind smashing into my face, especially whenever my head is tilted closer to parallel.  There's something about feeling less wind on my head that makes it easier to focus on my efforts and form.  The helmet is especially useful in headwinds because I can't feel the resistance on my head as much as I used to.

ADDITIONAL QUESTIONS
While I've only covered things that I've experienced so far, feel free to leave a comment below to ask additional questions about this helmet.  I'll expand this review as the comments come in.

Q&A *Updated 05.24.13*:
What would it take for the visor to get knocked off?  In situations where the visor gets hit directly, the visor stays on surprisingly well.  To test this, I let my girlfriend hit me in the face with pillows.  I know.. very scientific!  Despite hitting me very hard from the front, sides and below, the visor never felt like it wanted to detach from the helmet.  With that said, there was only one way I found that could cause the lens to detach.  By pushing one side of the lens away from my face, I was able to fling the lens off of the helmet.  The only way this could happen is if you wipe your face and accidentally catch the side of the lens with a thumb.  You could also accidentally drop the lens if you try to remove the lens by grabbing the lens from the side instead of from the center.

Does it chatter or flex at all in the wind?  It doesn't chatter or flex at all.

Temperature when standing still/ going slow (aka, climbing)?  At slow climbing speeds, my head still feels a lot cooler mainly because of the sun protection from having less vents.  Although in humid/ slow speeds, the helmet fails quite a bit.  It gets toasty and sweaty fast if you end up getting stuck trying to climb on a humid day.

Sunday, April 14, 2013

Eagle Creek Park Cycling Grand Prix v2.0 - FIRST PLACE & FIRST PODIUM FINISH!

I can't even begin to describe how awesome it felt to have two dreams come true at once!  I always wondered what it would be like to be on the podium, but I never thought I had a chance at first place!

THE COURSE
Below is a map of the course highlighted in blue.  It ran counterclockwise.  There were a few corners that stuck out to me.
Bottom right (corner #1):  This wasn't a very sharp corner, but the trees and brush made it difficult to see around it, so the group had a tendency to slow down and merge into a single line here.
Top right (corner #2):  This corner was very sharp, so oftentimes the group would merge into one or two pacelines, especially at higher speeds.
Top left (corner #3):  The inside half of this corner was covered by loose asphalt, so it wasn't an ideal or safe place to pass.  Pretty much everyone had to take a very awkward, wide line.  We could only fit about three abreast in this corner.
Bottom left (corner #4):  This was a very fast corner that led straight into a short ~4% climb which tapered into a flat road towards the finish line.
THE LAST LAP
We lifted the pace significantly in the final lap and I was about four wheels back by the time we entered the bottom right corner.  As we were approaching corner two, I accelerated to hold my position near the front to avoid getting pushed back by traffic within the group.  After exiting corner two, I glanced back and noticed that the group strung out due to the sharpness of the corner, so I relaxed and held my position to recover until they bridged all of the mini gaps.  One by one, two of the riders at the front of our lead group shifted off the paceline to force everyone to work harder.  By the time the group caught up, it was time to prepare for corner three- a corner where it was almost impossible to pass safely.  After corner three, only one rider remained.

The last rider was very powerful and I knew the downhill leading into corner four was his forte, so I waited until after corner four to make my move.  As soon as the rider I was drafting began to lose speed quickly, I broke off his wheel and sprinted for dear life!  Before I reached the summit, every rider fell out of my peripheral vision rather quickly.  Since I had a feeling that the larger and more powerful riders would try to pass me after the climb tapered into a flat, I summoned everything I had to sprint even harder in an effort to hit my top speed first.  The plan was to hit a speed that no one else could exceed.  As I approached the finish line, all I could think about was "am I really going to win?"  I couldn't believe it at first, but from the climb to the finish line, I never saw a rider in my peripheral vision, so it was clear that I won.

After talking to my parents and my friend's wife who came to cheer me on, I learned that a rider tried to draft my wheel and slingshot ahead.  Luckily, as soon as he left my draft, he was only able to speed-match me.  I ended up taking first by about a bike length!

EMBARRASSING!
I don't know why this happened, but at around three laps to go, I started to feel a draft on my leg.  I later looked down at my legs and noticed that my shorts started rolling up my thigh!  It eventually rolled up high enough to expose a large section of skin between my shorts and my leg warmers, so it looked like I was wearing stockings!  I hope the photographer Photoshopped my clothes back together!

THE FINAL SPRINT ANALYSIS
Here is a screenshot of the final sprint from my Strava page.  Thank you Strava for exaggerating the power of my uphill sprint! :)
Below is a screenshot from my Polar ProTrainer 5 software.  The spreadsheet below shows second by second data for speed, cadence, heart rate and elevation.  The sprint started at 1:15:22 and ended at 1:15:32.  Apparently, I accelerated from 26.5 mph to 28 mph in the uphill sprint.  I reached a top speed of 29.7 mph and progressively lost speed as I approached the finish line.  I crossed the finish line at 29.3 mph.
POLAR CS600X HEART RATE ANALYSIS
I'm not the type to hide my data, especially since these numbers vary from person to person, so here it is!  This is what each colored bar represents:
  • RED:  Pure anaerobic- Sprints and hard accelerations
  • GOLD:  Lactic Threshold- Long, sustained accelerations or quick changes in power/ effort (climbs)
  • GREEN:  VO2max- The highest intensity that my aerobic system can operate before switching to the anaerobic system.
  • BLUE:  Submaximal Aerobic- An intensity that can be sustained for hours because it is dominantly aerobic.  Low intensity.
Heart rate zone summary
Heart rate zone summary:  This chart shows how long I remained in each zone out of a total duration of 42 minutes 21 seconds (100%).  For 33 seconds (1.3%), I was able to reach an intensity well below my VO2max.  I likely reached this zone between corner two and three because this long section of road was mostly downhill, so I was able to coast more often, especially within the pack.  For 17 minutes and 57 seconds (42.4%), I was working close to my VO2max.  In training, I can hold a steady state VO2max effort for about 1.5 hours without losing power.  In order to reach this zone during the race, I tried to underestimate how hard I needed to pedal to maintain my speed.  Anytime the pace lifted, I tried to accelerate as slowly as possible to remain in the aerobic zone.  For 19 minutes and 46 seconds (46.7%), I was working at or close to my lactic threshold.  This likely occurred in the climbs and the accelerations after each corner.  I was in the pure anaerobic zone for 4 minutes and 5 seconds or 9.6 percent of the time.  I hit this zone when I attempted a breakaway 20 minutes into the race and in the last minute of the race leading to the final sprint.
Heart rate zone distribution
Heart rate zone distribution:  The chart above shows what energy system was dominantly used during the race.  My goal was to use my aerobic system more than my anaerobic system by trying to race less aggressively and conserve energy.  Although most of my time was spent right at the threshold between my aerobic and anaerobic system, this chart shows that I spent four percent more time aerobic than at or above my lactic threshold.
Curve view (HR, cadence, speed, elevation, temperature):  Anytime the red line (heart rate) was in the yellow zone, you could pretty much guarantee that I was suffering a lot.  In the final sprint, my entire body was screaming!

THE EQUIPMENT
I've been holding off on a nice set of wheels because my friends and I have always wanted to compete at a "disadvantage."  This mainly meant no high-end wheels.  Although after today, I'm seriously considering to get a nice set of wheels.  Maybe the new Karbon Speed XA.  Shhh! :)
Bike:  2011 Kestrel Talon Road Bike
Computer:  Polar CS600X w/ speed, cadence and heart rate
Saddle:  Selle SMP Evolution
Pedals:  Look Keo 2 Max
Tires: Continental GP4000S
Tubes:  Michelin AirComp Ultra Light
Front Wheel:  Forte Titan ($64)
Rear Wheel:  Shimano RS80 C24

THE PODIUM PICTURE
You can tell how new the riders are to podium finishes by the number of shots it takes to get the right picture. :)
Looks like we're doing the wave?
Something's still off...
Nice!
First place prize money.
I'm not going to spend it for good luck!
FROM DNF'S TO TOP FINISHES
This season has been a complete 360 with regards to performance.  Last year, I was always in fear of getting dropped and pulled out of the races.  I remember racing this same course a year ago- it took everything I had to keep up with the peloton.  It marked the first time I finished with the pack.  It felt like a huge accomplishment just to have my name on the list without the letters "DNF" next to it.  Prior to this personal achievement, I was pulled out of every race that I signed up for because I wasn't able to keep up (about seven races).  The thought of giving up crossed my mind many times, but I always fought through it.  I still remember those feelings as if it were yesterday, and I'm glad I was able to overcome those barriers because today's victory was well worth the struggle!

SPONSORS
Big thanks to WeightVest.comPolar USA and De Soto Sport for taking the chance to sponsor me.  The Polar CS600X has been very useful in training specific energy systems more accurately.  Although I never got a chance to test the De Soto Sport leg coolers since the temperatures were too low, I wore the head beanie during the race and loved it!  Since I wore it dry, it kept my head warm all day.  It gripped my head really well and also helped hold my prescription glasses and helmet in place during the race.

Special thanks to WeightVest.com because they supported me during the time where I consistently got dropped and pulled out of every race.  It would be an understatement to say that their 150 lbs weighted vest contributed hugely to my progress.  My cycling technique, posture, explosiveness and overall power on the bike wouldn't have been the same without their support.

Sunday, April 7, 2013

SOLVED: Polar heart rate monitor- Heart rate spikes

UPDATED 04/11/2013

Honestly, I was secretly not looking forward to the warm weather because it meant that I'd have to wear loose-fitting clothing again.  Unless I was wearing a super tight skinsuit, nothing would prevent my heart rate data from spiking and giving me an erratic reading.  I tried using dryer sheets to remove the static and using electrode gel, but they never fixed the problem permanently.  As long as there was wind, it would create enough static on my jersey to throw off my heart rate readings.  Here's a screenshot of a steady state workout I did a few days ago.  There were all sorts of errors...
Below is a screenshot of an interval workout after I covered the transmitter in aluminum foil.  Notice how there are absolutely no heart rate errors!  The elevated heart rate in the center was an actual effort.
After countless hours battling with this issue, I finally have perfect heart rate graphs!  I've thought about using aluminum foil for months, but I never tried it because it seemed too easy to be true.

UPDATE:  The original one-minute-fix didn't last very long because it progressively developed rips and exposed part of the transmitter.  Instead of using aluminum foil and electric or duct tape again, I used Aluminum Foil Tape.  I bought a roll from Walmart.  The Aluminum Foil Tape seems to be more promising since the adhesive creates a better seal and is less likely to rip.  Here are few pictures of my transmitter wrapped in Aluminum Foil Tape.  Looks much better and it should last a lot longer...  though I don't know what I'll do with the rest of the roll!
DUCK Brand Aluminum Foil Tape.
WIND Polar Transmitter front view.
WIND Polar transmitter rear view.
THE PROTOTYPE:  This is what the original one-minute-fix looked like.  It was ugly, but it worked!
STEP 1:  Cut a strip of duct tape or electrical tape.
I'm running out of duct tape.
STEP 2:  If you want to be exact, cut a 2 1/4" (5.7cm) x 3 1/8" (7.9cm) rectangle using aluminum foil.  If you don't care about being neat and clean, you can also rip off a piece of foil and trim as you go.
Aluminum foil
STEP 3:  Carefully wrap the transmitter in aluminum foil and secure it with tape.
Front of Polar WIND transmitter
Back of Polar WIND transmitter
 STEP 4:  Go for a ride and never worry about heart rate errors again!  Smile and enjoy!

Caleb Ewan's Sprint Position - Technique Breakdown

Caleb Ewan has been disrupting the sprint scene with a "new" sprinting technique that combines the aerodynamic benefits of a super...